OnlyFans video editing transforms raw footage into pro-level content that keeps subscribers hooked and spending more
Why Your Amateur Editing Is Costing You $400–800/Month?
Director, let me guess: You’re filming great content. Your lighting is decent. Your angles are improving. But then you edit the video on your phone in 10 minutes, upload it, and wonder why your subscribers aren’t upgrading their tiers.
Here’s the truth: editing is where amateurs and professionals separate.
Film like a pro! Purchase The Home Porn Filmmaker System!
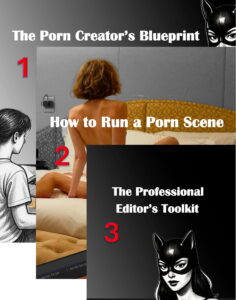
This bundle covers the full process of creating watchable, intentional home porn – from planning and identity, through filming and performance, to editing and final delivery.
Instead of random tips, you get a complete system: how to think before the shoot, how to run the scene while filming, and how to shape raw footage into a finished video people actually want to watch.
If you want your content to feel deliberate instead of accidental, this is the complete guide.
After reading you will film better than 99% percent of porn directors!
ONLY FOR $50
Film like a pro! Purchase The Home Porn Filmmaker System!
This bundle covers the full process of creating watchable, intentional home porn – from planning and identity, through filming and performance, to editing and final delivery.
Instead of random tips, you get a complete system: how to think before the shoot, how to run the scene while filming, and how to shape raw footage into a finished video people actually want to watch.
If you want your content to feel deliberate instead of accidental, this is the complete guide.
After reading you will film better than 99% percent of porn directors!
ONLY FOR $50
And I’m not talking about adding sparkle effects or using the latest TikTok filter. I’m talking about real editing -the kind that makes subscribers watch your content and think, “This looks expensive.”
Because here’s what’s happening right now: your subscribers are watching your content and their brains are registering “amateur editing” before they consciously realize it. They see inconsistent colors between clips. They feel jarring transitions. They notice audio that suddenly gets loud, then quiet, then loud again.
And they unsubscribe.
Not because your body isn’t attractive. Not because your performance is bad. Because the editing signals “amateur,” and they’re paying for professional.
The Revenue Impact of Bad Editing
I’ve worked with 50+ OnlyFans creators. Here’s what happens when they upgrade from amateur editing to professional techniques:
- +30–50% longer watch times (people actually finish your videos)
- +40–60% higher replay rate (they watch multiple times)
- +25–35% increase in tips (they appreciate the quality)
- +$400–800/month in additional revenue per creator
One creator went from $6K/month to $11K/month in 60 days. Same content. Better editing.
The difference? She stopped editing like an amateur and started editing like a director.
What “Professional Editing” Actually Means
Director, let’s clear something up: professional editing isn’t about expensive software or spending 10 hours on a 5-minute video.
Professional editing means:
- Every frame looks intentional (not random)
- Colors are consistent across all clips
- Pacing controls attention (fast when needed, slow when needed)
- Audio is clean and level (no surprises)
- Transitions are smooth (not jarring)
That’s it. That’s professional editing.
You can do this in DaVinci Resolve (free). You can do this in CapCut on your phone. You don’t need Final Cut Pro X or Adobe Premiere Pro.
You just need to understand how professionals think about editing.
Part 1: The Director’s Pre-Edit Workflow (This Saves You 2+ Hours)
Before I touch editing software, I spend 15 minutes organizing. This saves me hours later.
Here’s the professional workflow:
Step 1: Organize Your Footage
Amateur approach:
Import everything into the editor, start cutting randomly, get overwhelmed, give up.
Professional approach:
- Create a folder structure before importing:
- Raw_Footage (originals, never touch these)
- Selected_Clips (the takes you’ll actually use)
- Final_Export (finished videos)
- Watch all footage once before editing:
- Mark the best takes
- Delete unusable footage immediately
- Name clips descriptively: “Angle1_Take3_GOOD” not “IMG_4827”
Time saved: ~45 minutes (you’re not hunting for clips during editing)
Step 2: Select Your Best Takes
Professional directors call this “dailies review.” You’re reviewing yesterday’s footage and deciding what makes the final cut.
The 3-Question Test:
- Is the lighting consistent with other clips?
- Is this the best performance of this moment?
- Does this move the “story” forward?
If any answer is “no,” don’t use it. Be ruthless.
Director’s secret: your first take is rarely your best take. Your 3rd or 4th take is usually where you relax and perform naturally.
Step 3: Plan Your Edit (The Storyboard Approach)
Amateur editors start cutting footage and “figure it out as they go.”
Professional editors plan first.
My planning template (takes 5 minutes):
- Opening (5–10 seconds): establish scene, create hook
- Build (60–70% of video): gradually increase energy
- Peak (5–10% of video): the moment they came for
- Conclusion (5–10 seconds): leave them wanting more
Write this down before you start editing. You’ll thank me later.
Time saved: 60+ minutes (you’re not aimlessly cutting footage)
Part 2: Choosing Your Editing Software (Free to Professional)
Director, the software doesn’t matter as much as you think. I’ve edited professional content in CapCut. I’ve seen terrible edits in Adobe Premiere Pro.
Here’s what you actually need:
Free Options (Start Here)
DaVinci Resolve (FREE – Desktop)
- Best for: serious beginners who want professional tools
- Pros: incredible color grading, completely free, no watermark
- Cons: steeper learning curve (but worth it)
- Director’s take: this is what I recommend to everyone starting out
- Learning time: 2–3 hours to get competent
CapCut (FREE – Mobile & Desktop)
- Best for: quick edits, mobile-first creators
- Pros: user-friendly, templates, on-the-go editing
- Cons: less control than DaVinci, some features locked behind Pro
- Director’s take: great for beginners, but you’ll outgrow it
- Learning time: 30 minutes to get started
Mid-Tier Options
Adobe Premiere Rush ($10/month)
- Best for: creators who want Adobe ecosystem without complexity
- Pros: syncs across devices, simplified Premiere Pro
- Cons: limited compared to full Premiere Pro
- Director’s take: good middle ground, but I’d still pick free DaVinci Resolve
Professional Options
Adobe Premiere Pro ($23/month)
- Best for: editors making $3,000+/month who need advanced tools
- Pros: industry standard, every feature you’ll ever need
- Cons: expensive, overkill for most OnlyFans creators
- Director’s take: upgrade only when your revenue supports it.
Final Cut Pro ($300 one-time, Mac only)
- Best for: Mac users who want serious pro editing
- Pros: one-time purchase, optimized for Mac, fast rendering
- Cons: Mac only, higher upfront cost
- Director’s take: great if you’re on Mac and editing a lot
My Recommendation
- Month 1–3: start with CapCut (mobile) to learn basics
- Month 4+: switch to DaVinci Resolve (desktop) for pro control
- When making $3K+/month: consider Premiere Pro or Final Cut Pro
Part 3: The 5 Professional Editing Techniques That Matter
Director, forget the 100 features your editor has. Focus on five techniques that make 90% of the difference.
Technique #1: Color Grading (Instant “Pro” Look)
What it is: adjusting the colors in your video so all clips look consistent and intentional.
Why it matters: your brain notices color inconsistency before anything else.
One clip warm, next clip cool? Amateur.
Professional approach:
- Color correct first – make all clips neutral
- Color grade second – add your “look”
How to do it:
- DaVinci Resolve: use Color tab → adjust temperature, tint, exposure
- CapCut: Adjust → Temperature, Brightness, Saturation
Goal: all clips feel like they were filmed in the same world.
5-second test: scrub your timeline. If clips look like different days / rooms, keep grading.
Revenue impact: +$200–400/month (subscribers feel instant quality bump)
Technique #2: Pacing & Rhythm (Controlling Attention)
What it is: how long each shot stays on screen before you cut.
Why it matters:
- Fast pacing = energy
- Slow pacing = intimacy
- Random pacing = amateur
Professional approach:
- Opening: fast cuts (2–4 sec per shot) – hook them
- Build: medium cuts (4–8 sec) – anticipation
- Peak: longer cuts (6–10+ sec) – let the moment breathe
- Conclusion: slightly faster again (2–4 sec) – leave on energy
Amateur mistake: every shot is the same length.
Director’s secret: if a shot is boring, shortening it won’t make it interesting. Cut it entirely.
Revenue impact: +$300–600/month (watch time skyrockets)
Technique #3: Smooth Transitions (Not Jarring Cuts)
What it is: how you move from one clip to the next.
Why it matters:
Hard, random cuts feel cheap.
Smooth transitions feel intentional.
Professional approach:
- Use crossfades for 80–90% of transitions (0.5–1 sec)
- Use hard cuts only for impact moments
- Avoid flashy transitions (spin, page flip, cube) unless you’re doing comedy
How to do it:
- DaVinci Resolve: add Cross Dissolve between clips
- CapCut: select transition → choose Fade / Mix
Amateur tell: 10 different transitions in one video.
Revenue impact: +$150–300/month (less “WTF was that cut?”)
Technique #4: Sound Design (The 50% Everyone Ignores)
What it is: cleaning, balancing, and enhancing audio.
Why it matters: bad audio = instant unsubscribe.
Your viewers will tolerate okay video with good sound.
They will NOT tolerate great video with bad sound.
Professional approach:
- Normalize audio levels across all clips
- Remove background noise (fans, AC, traffic)
- Add subtle ambience if needed
- Use music quietly or not at all
How to do it:
- DaVinci Resolve (Fairlight): normalize, noise reduction
- CapCut: Noise Reduction + manual volume adjustments
Goal: you never reach for the volume button while watching.
Revenue impact: +$400–800/month (audio is that important)
Technique #5: Effects & Enhancements (Use or Lose)
What it is: slow motion, speed-ups, zooms, filters, etc.
Why it matters:
Used right = polish.
Used wrong = cheap.
Professional rules:
- Slow motion: only for emphasis, not entire video
- Speed-up: between beats, not during the main action
- Zoom/pan: slow, subtle Ken Burns style, not aggressive
- Filters/LUTs: pick one look and stick to it
- Glitch & crazy FX: almost never (unless your brand is chaos)
Director’s rule: if you’re excited about your effects, you’ve probably overdone them.
Good editing is invisible.
Revenue impact: +$100–200/month (removes “try-hard” vibe)